
A Tale of two Ender 3’s…
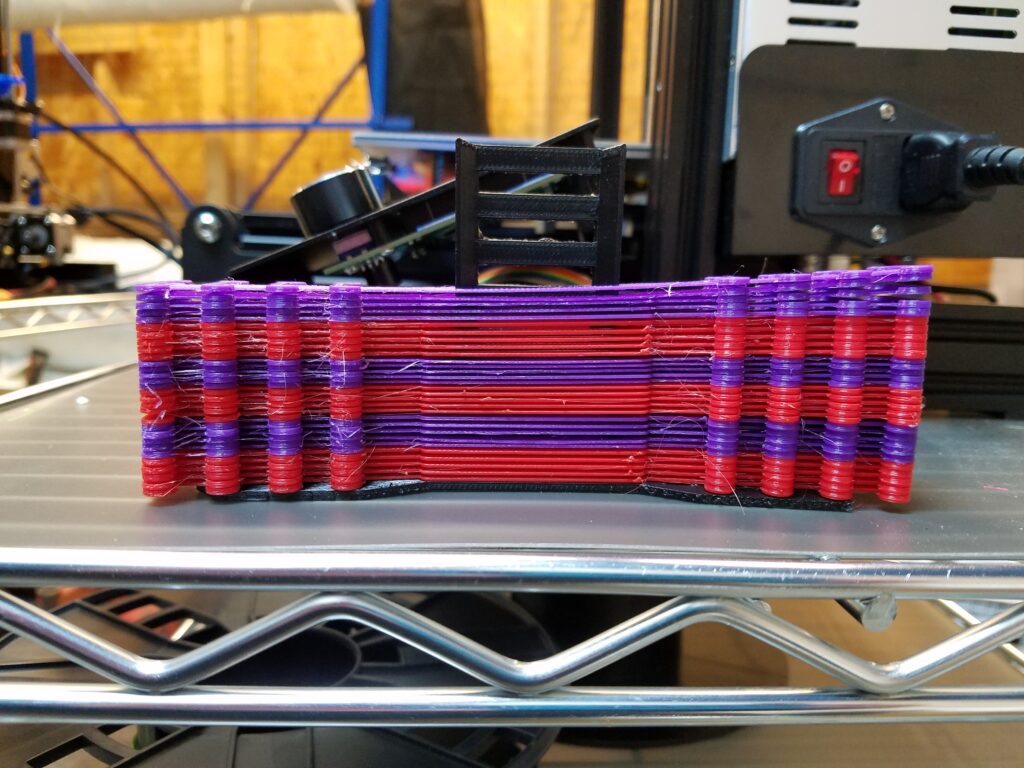
“Bob Ross” and “The Plastics” (TP) were printing surgical mask ‘ear saver’ clips. A friend wanted 40 of them for his audiologist friend as they found they were very helpful for not interfering with hearing aids when using masks. Upon further inspection with a caliper the clip on the right side of the machine (opposite of the Z axis screw) was considerably smaller than the left. Also, in a batch of 5 some variation was exhibited front to back.
In the picture, Bob Ross was printing red and TP was printing purple. Bob Ross fared better but still there was some variation. See part two for details. The X-axis beam on TP was noticeably oblique to the frame.
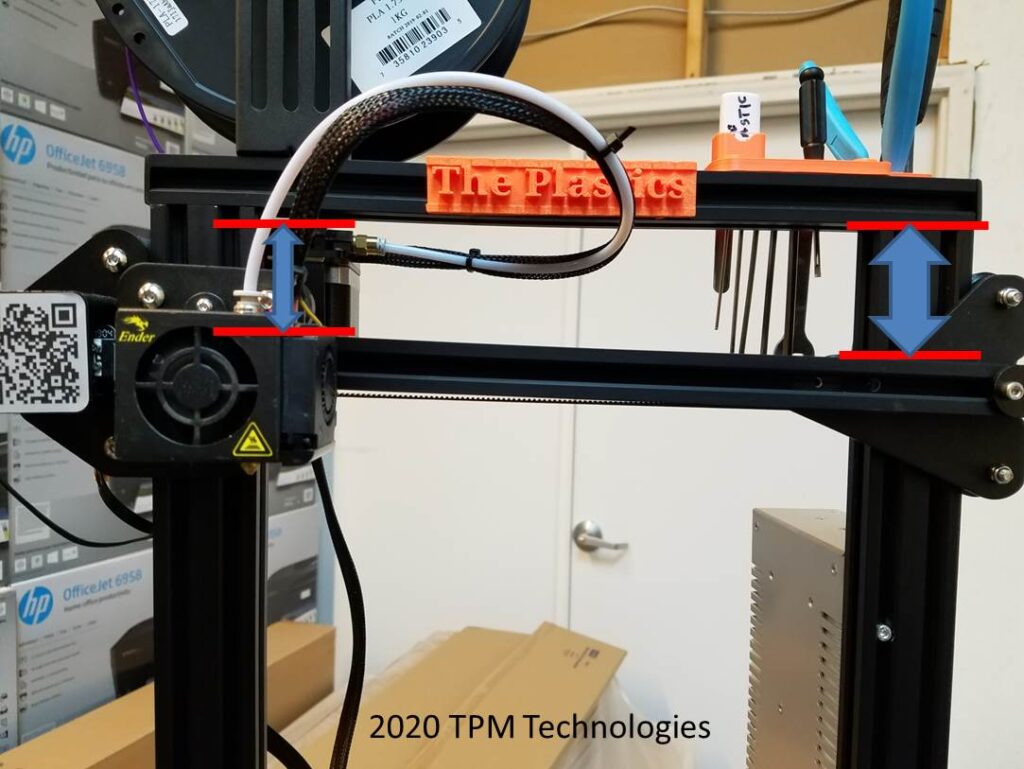
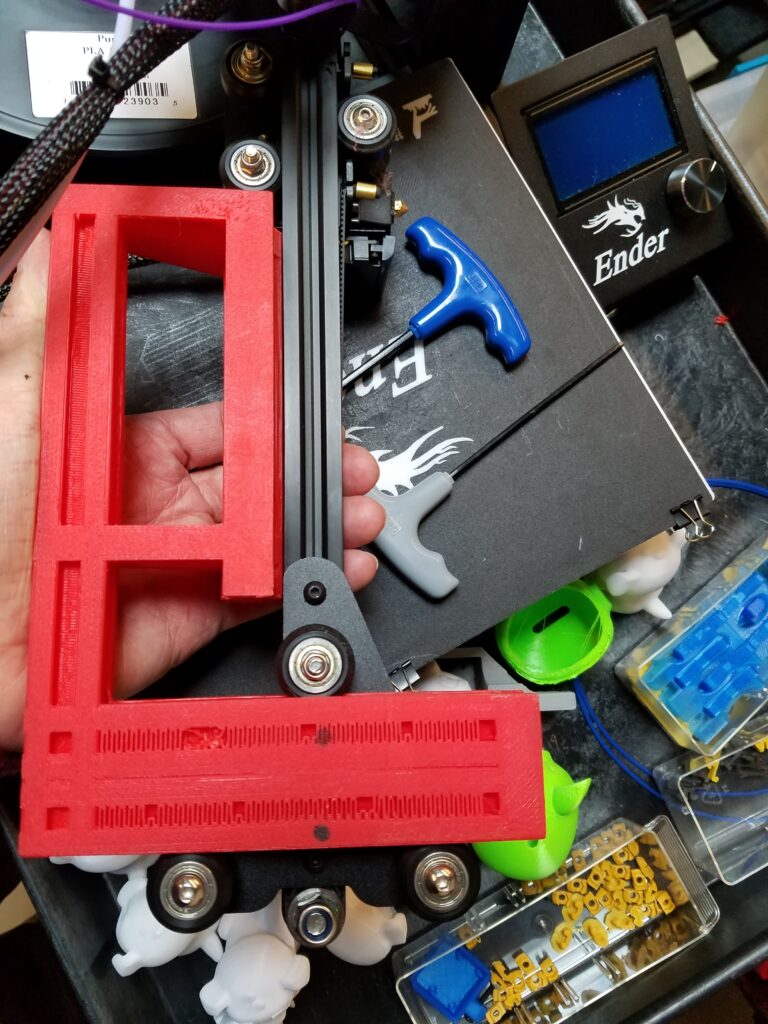
To make a long story short (See part three for the conclusion) an offset square was developed. It is a little tricky as the important relation is the line formed by the vertical rollers on the z-axis carriage and the extrusion beam that the extruder or X-axis carriage rides on. The mounting screws of the sheet metal pieces to the T-nuts on the extrusion can allow a considerable skew. The parallelism can be accommodated by adjusting the spring loaded tensioners on the heated bed. But once measurements were taken something seemed amiss. (See data analysis in part two.)
THE PUNCH LINE:
The square developed has a facsimile 20×40 rail with a 20×20 extension at the right offset to aid in assembling the roller plate and extrusion in a perpendicular relationship. Once TP was realigned, the next batch of parts looked extremely promising and we are awaiting the results quantitatively.
Stay tuned for Part Two and Part Three where we analyze the data, describe the realignment procedure and test the results!!