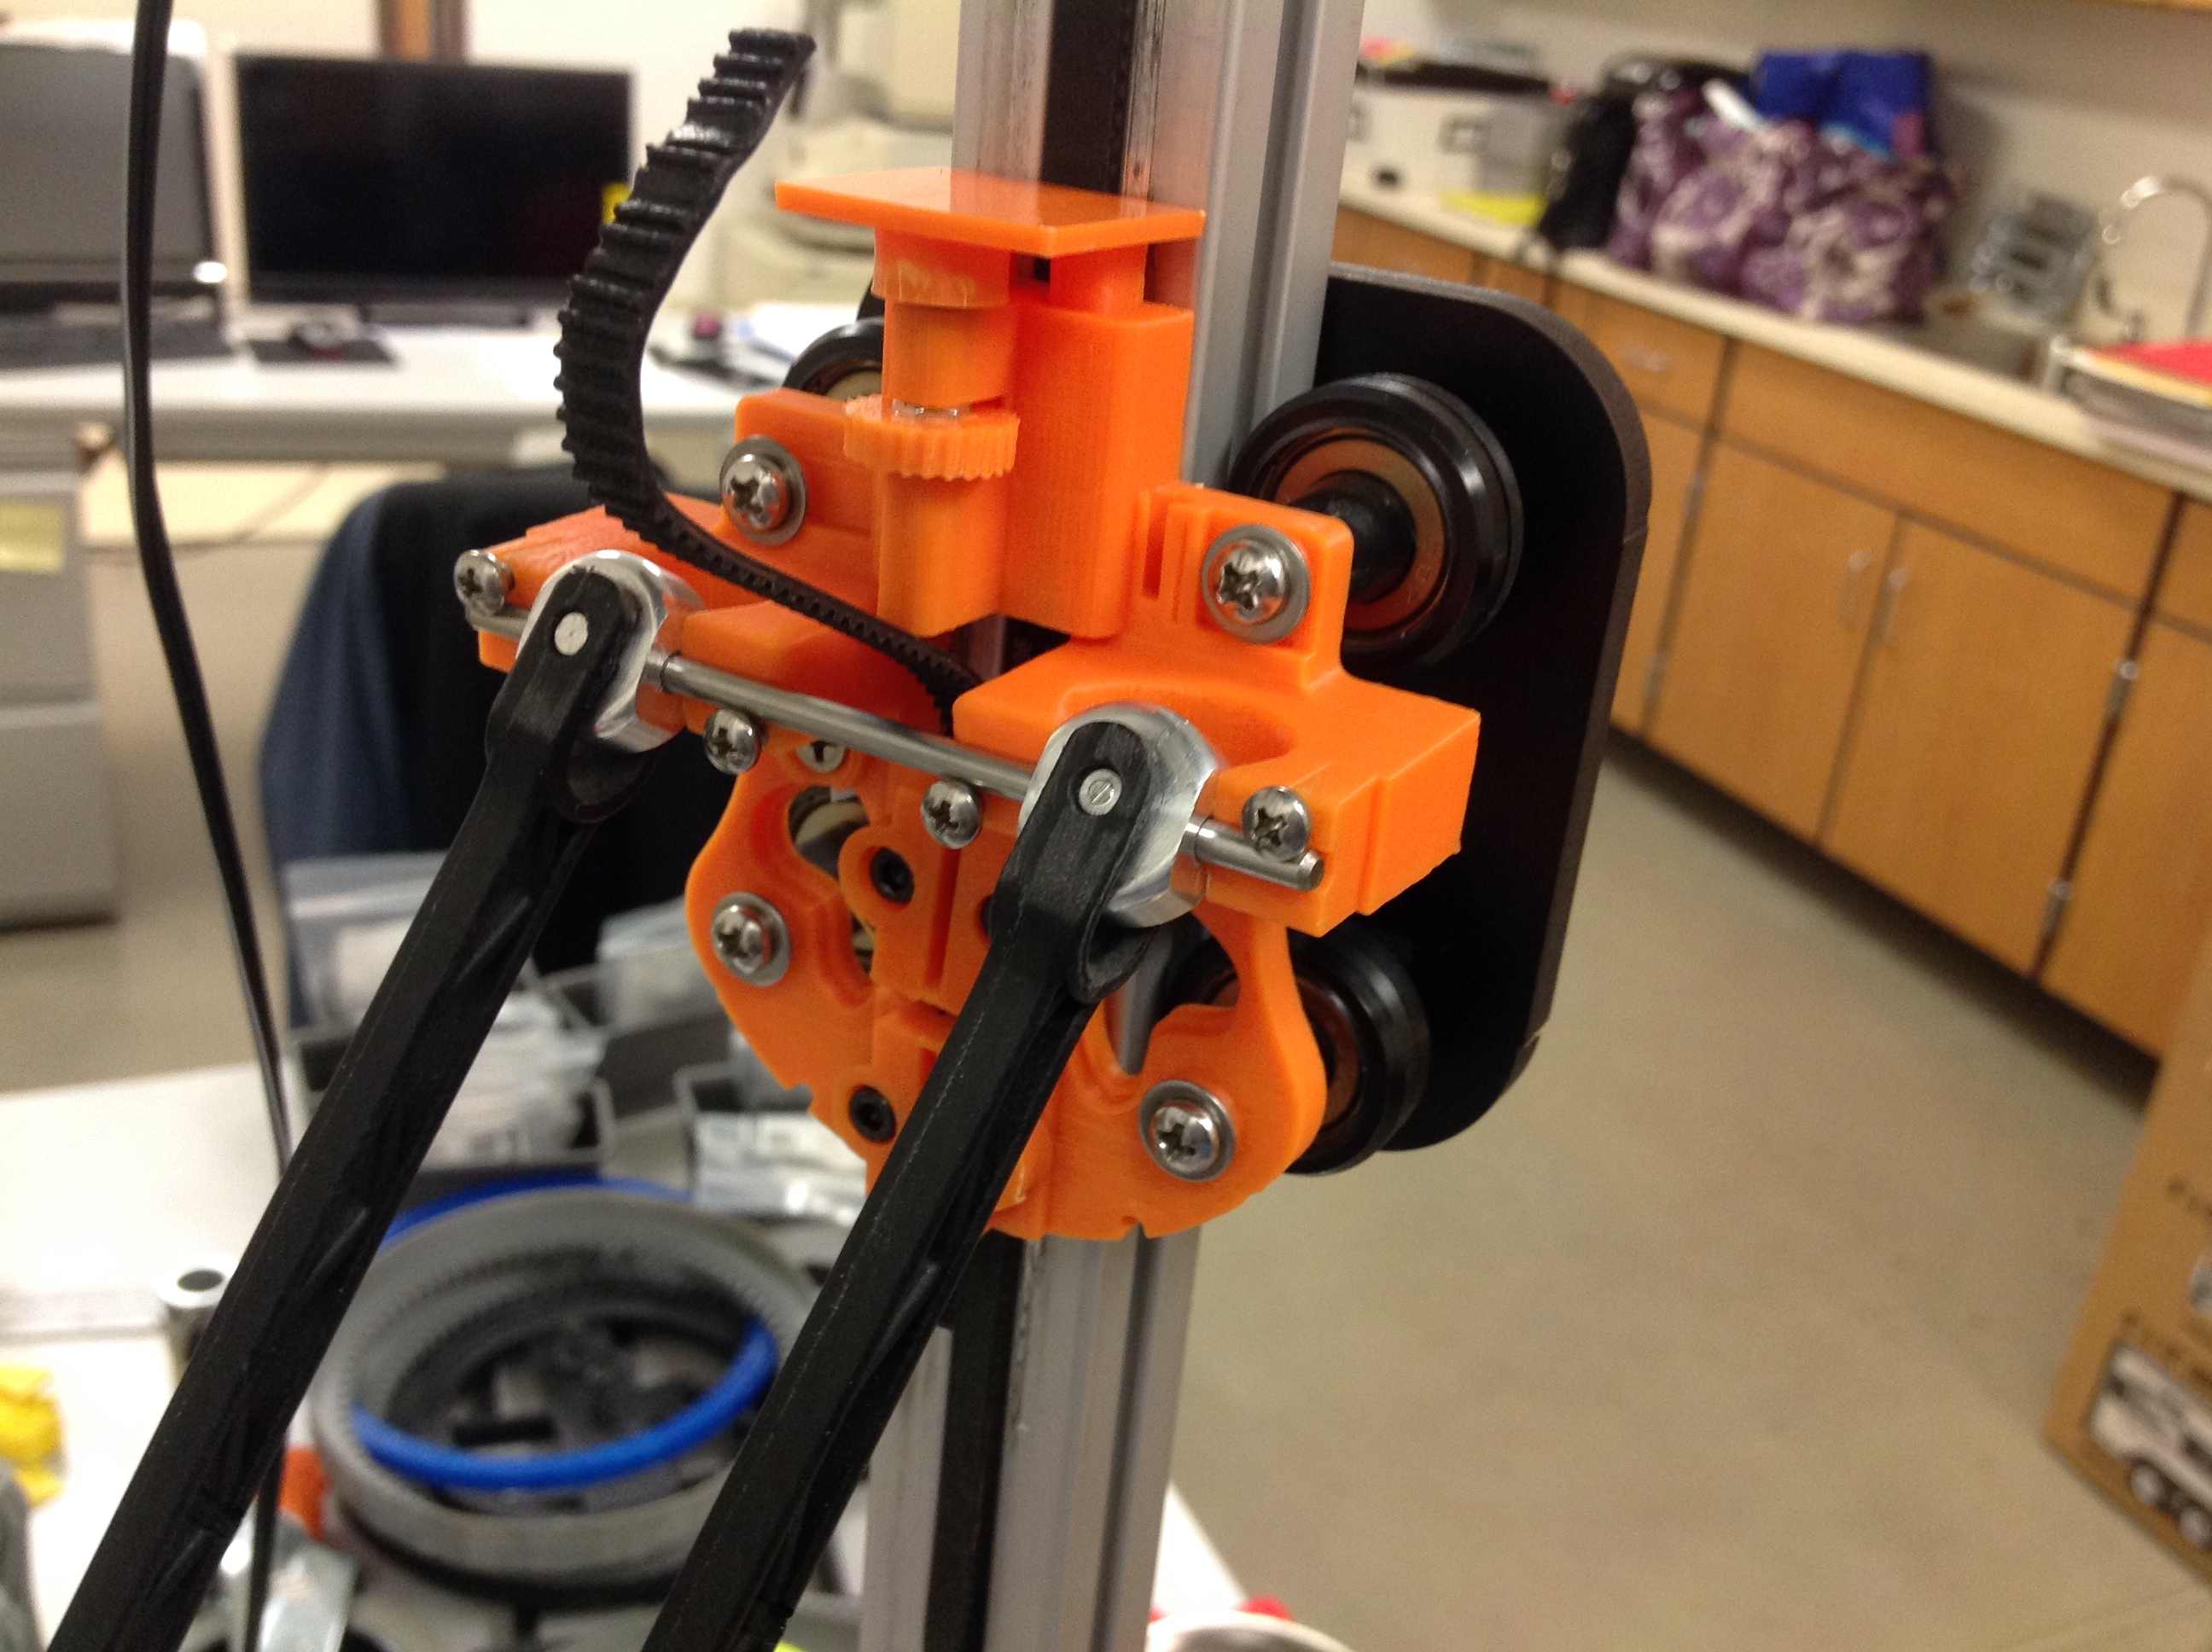
 The original home switch dog on the Rostock Max was a long screw that wobbled and interfered with the other pieces and didn’t consistently engage the limit switch. You need a screwdriver to tweak it. We replaced it with a nice engaging, consistent ledge. While we were at it we redesigned the whole cheap skate bearing block into a “banjo” complete with toothed belt clamps. The number of parts was significantly reduced as well. The best part is no tools are required to adjust the home dog location. A screw is used as a micro-adjust and the nut is trapped in a knob. The ribs of the knob are held in place with a spring printed in the housing.
The ‘banjo’ was designed in SolidWorks and printed in ABS on the Makerbot Replicator. Each axis is color-coded to match the belt tensioners. In this version the screws enter from the inside making the tightening clumsy as your screwdriver interferes with the rods and extruder. In a later design version the ‘banjo’ is modified to trap the nut in a hex socket and tightening is accomplished from the outside with no interference.