 At TPM Technologies we currently have a Makerbot Replicator and a Rostock Max. The build envelops are sufficient for most projects so far. Occasionally we have to get creative about placement or how to split a large assembly. It dawned on me that many part needs are long and slender but there isn’t a need to support an equilateral cube. Hence, we dubbed our large area printer “OrthoBot” as a way to describe this phenomenon. Think of a machine envelope required to print a femur, the largest bone in the body. That’s our quest. Or another way to think of it is the build envelope required to print a baseball bat. As we were kicking around approaches to this build envelope we happened across a new video on the Packt Publishing website, “Building a RepRap 3D Printer.”
I have to say I was totally impressed for several reasons. First, the quality of the video is inspiring. Having done many video projects over at StudioYouTube, I know how hard it is to make a good video. I was impressed by the videography and the ease of watching and how Sam Muirhead effectively used the video medium to pass along the content the rest of the team wanted to portray.
My next great surprise was that the Packt site would play the video just fine on my iPad so I could conveniently view it many places in my workshop, multi-tasking as I absorbed the sequence of the RepRap build.
Lastly, the content that the team put together is what every 3D printer builder can gain from. Even though they are using the i3 Berlin RepRap printer as the backdrop they have done a nice job of describing build elements and techniques that apply to many 3D printer build projects. Not only is the video full of nice technique but it is equally inspiring as you develop or build your own system. I found that once I started watching it was hard to stop. I kept sneaking away to finish watching to the end. My hat’s off to this team and their advancement of the open source 3D printing industry and RepRap. I’m sure many new applications will spawn from their efforts. You can check out the video here. More on OrthBot later.

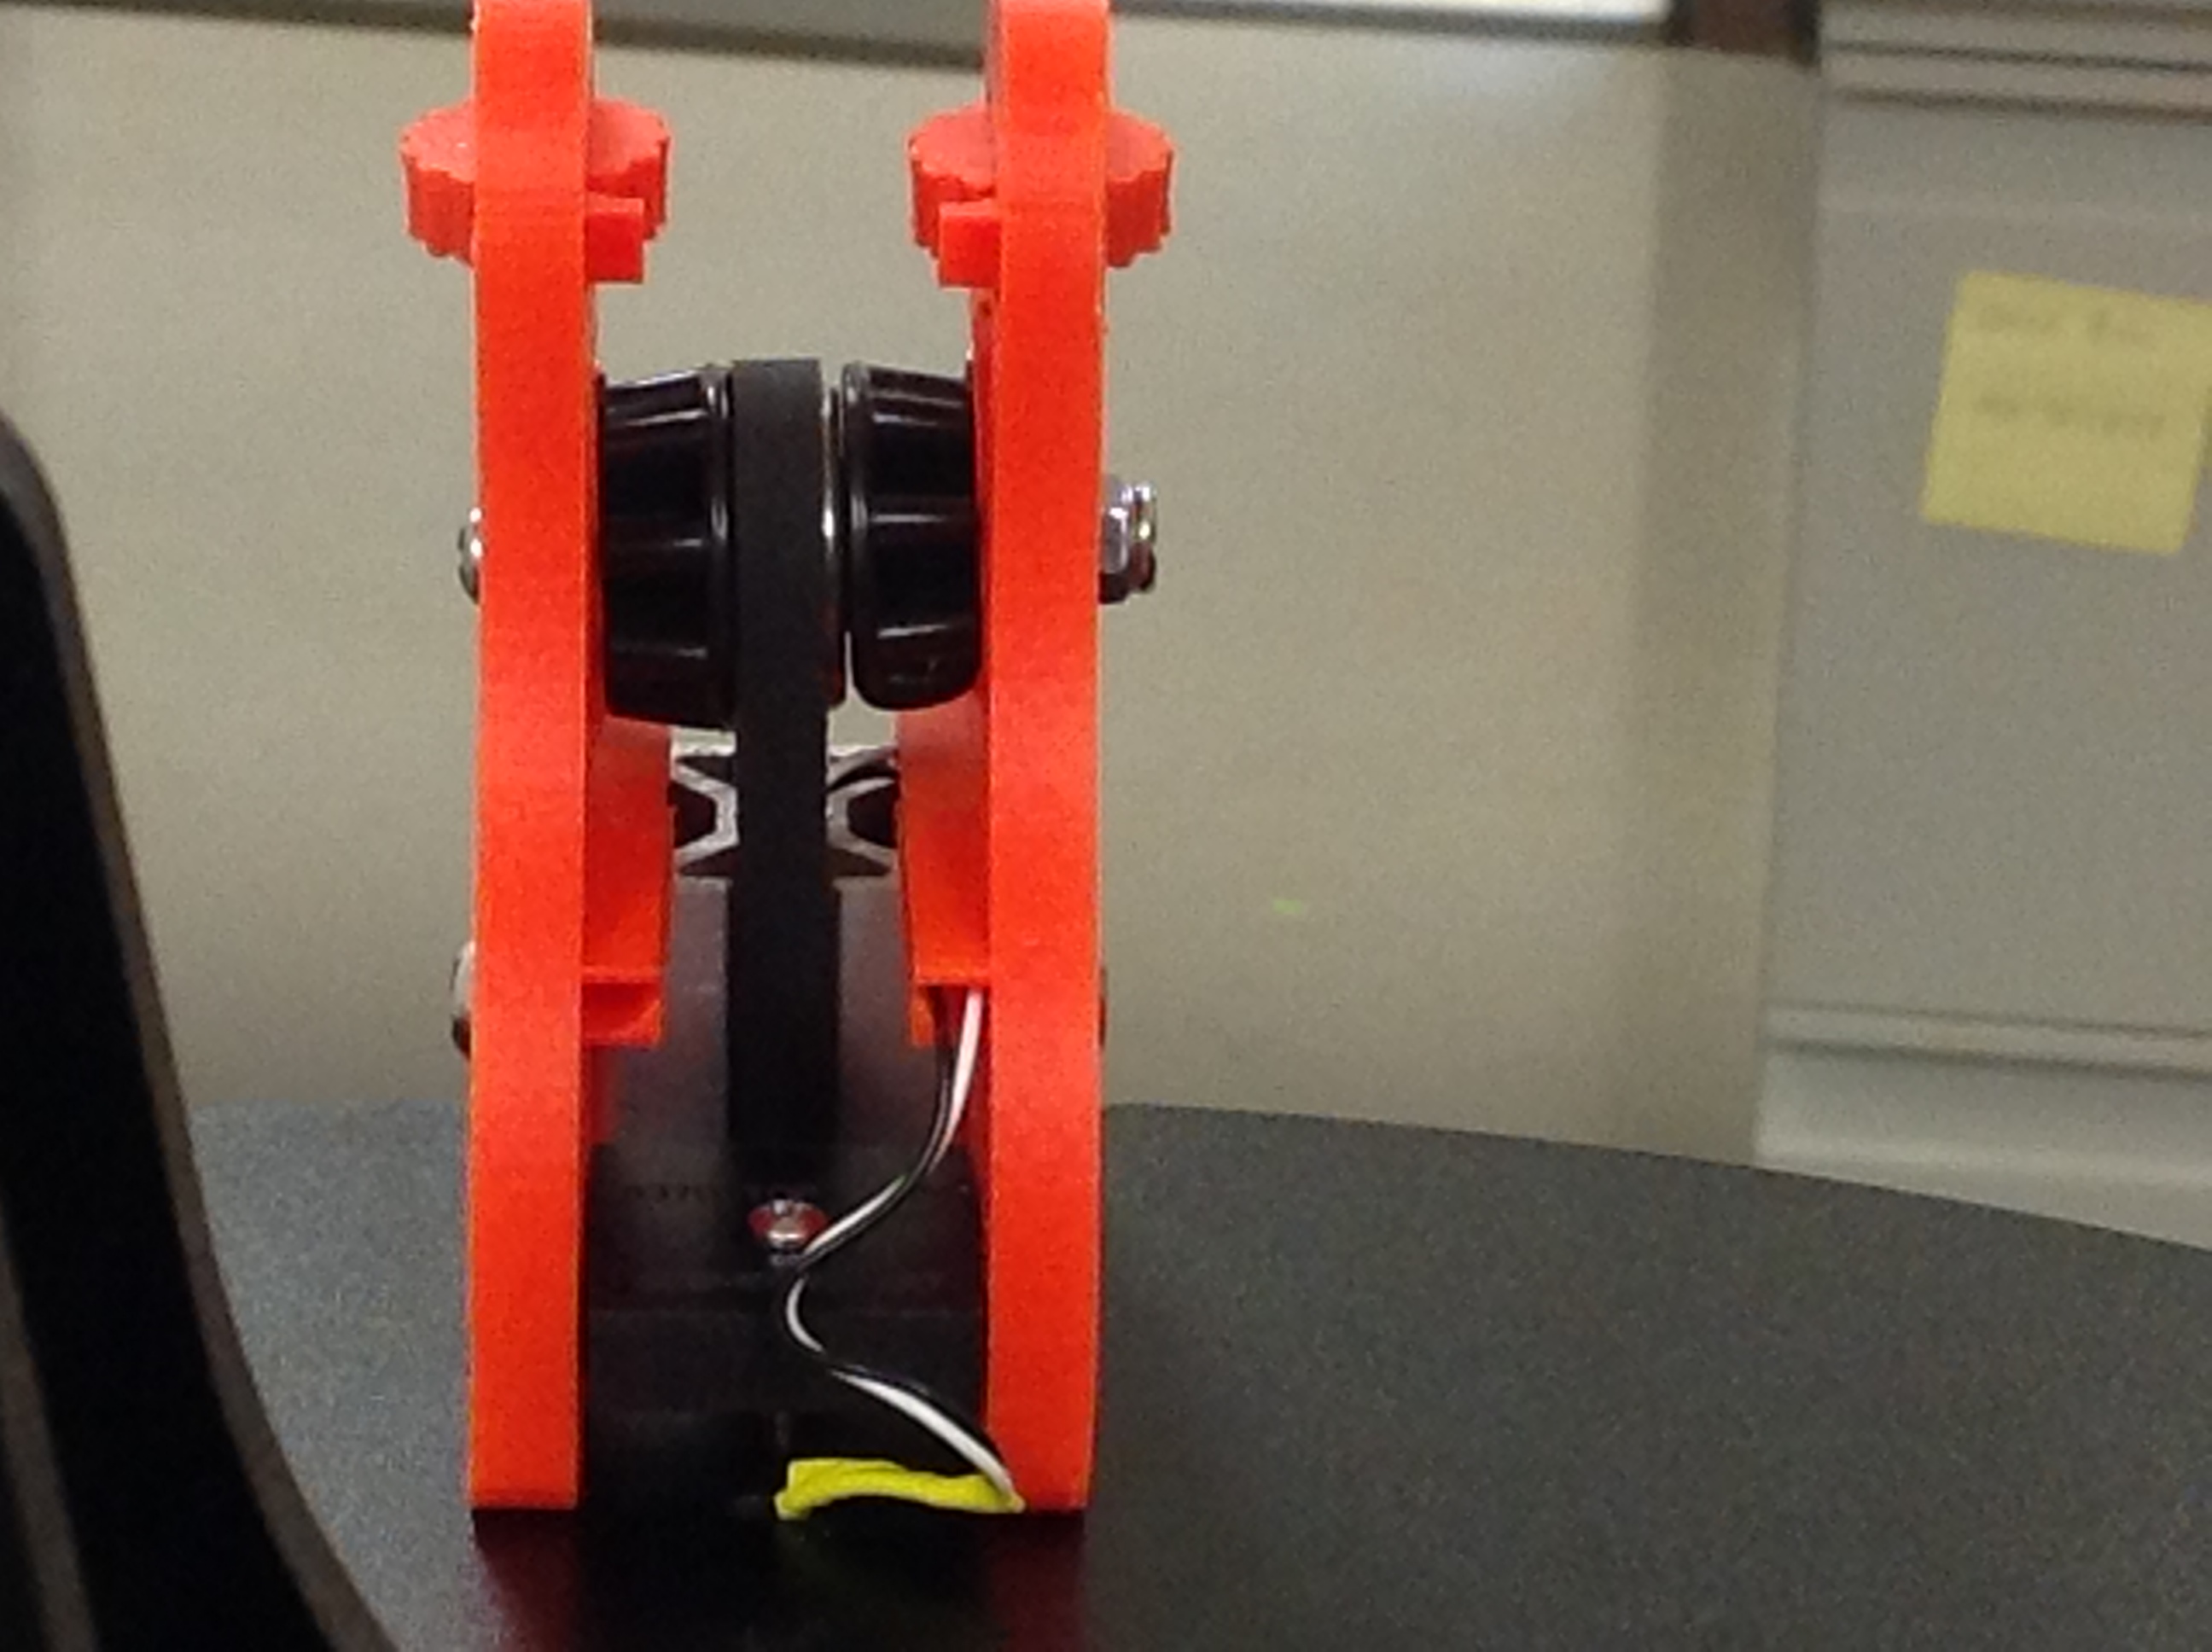
 Having an effective dust collection system for a CNC router keeps the area clean and chips don’t get a change to foul up the cutting. Pipe and snout pieces were designed in SolidWorks and printed in ABS. The primary nozzle has a T-slot where a flexible brush can be inserted. The system keeps the work surface tremendously clean. Parts were printed on FlashForge Creator and Creator Pro.
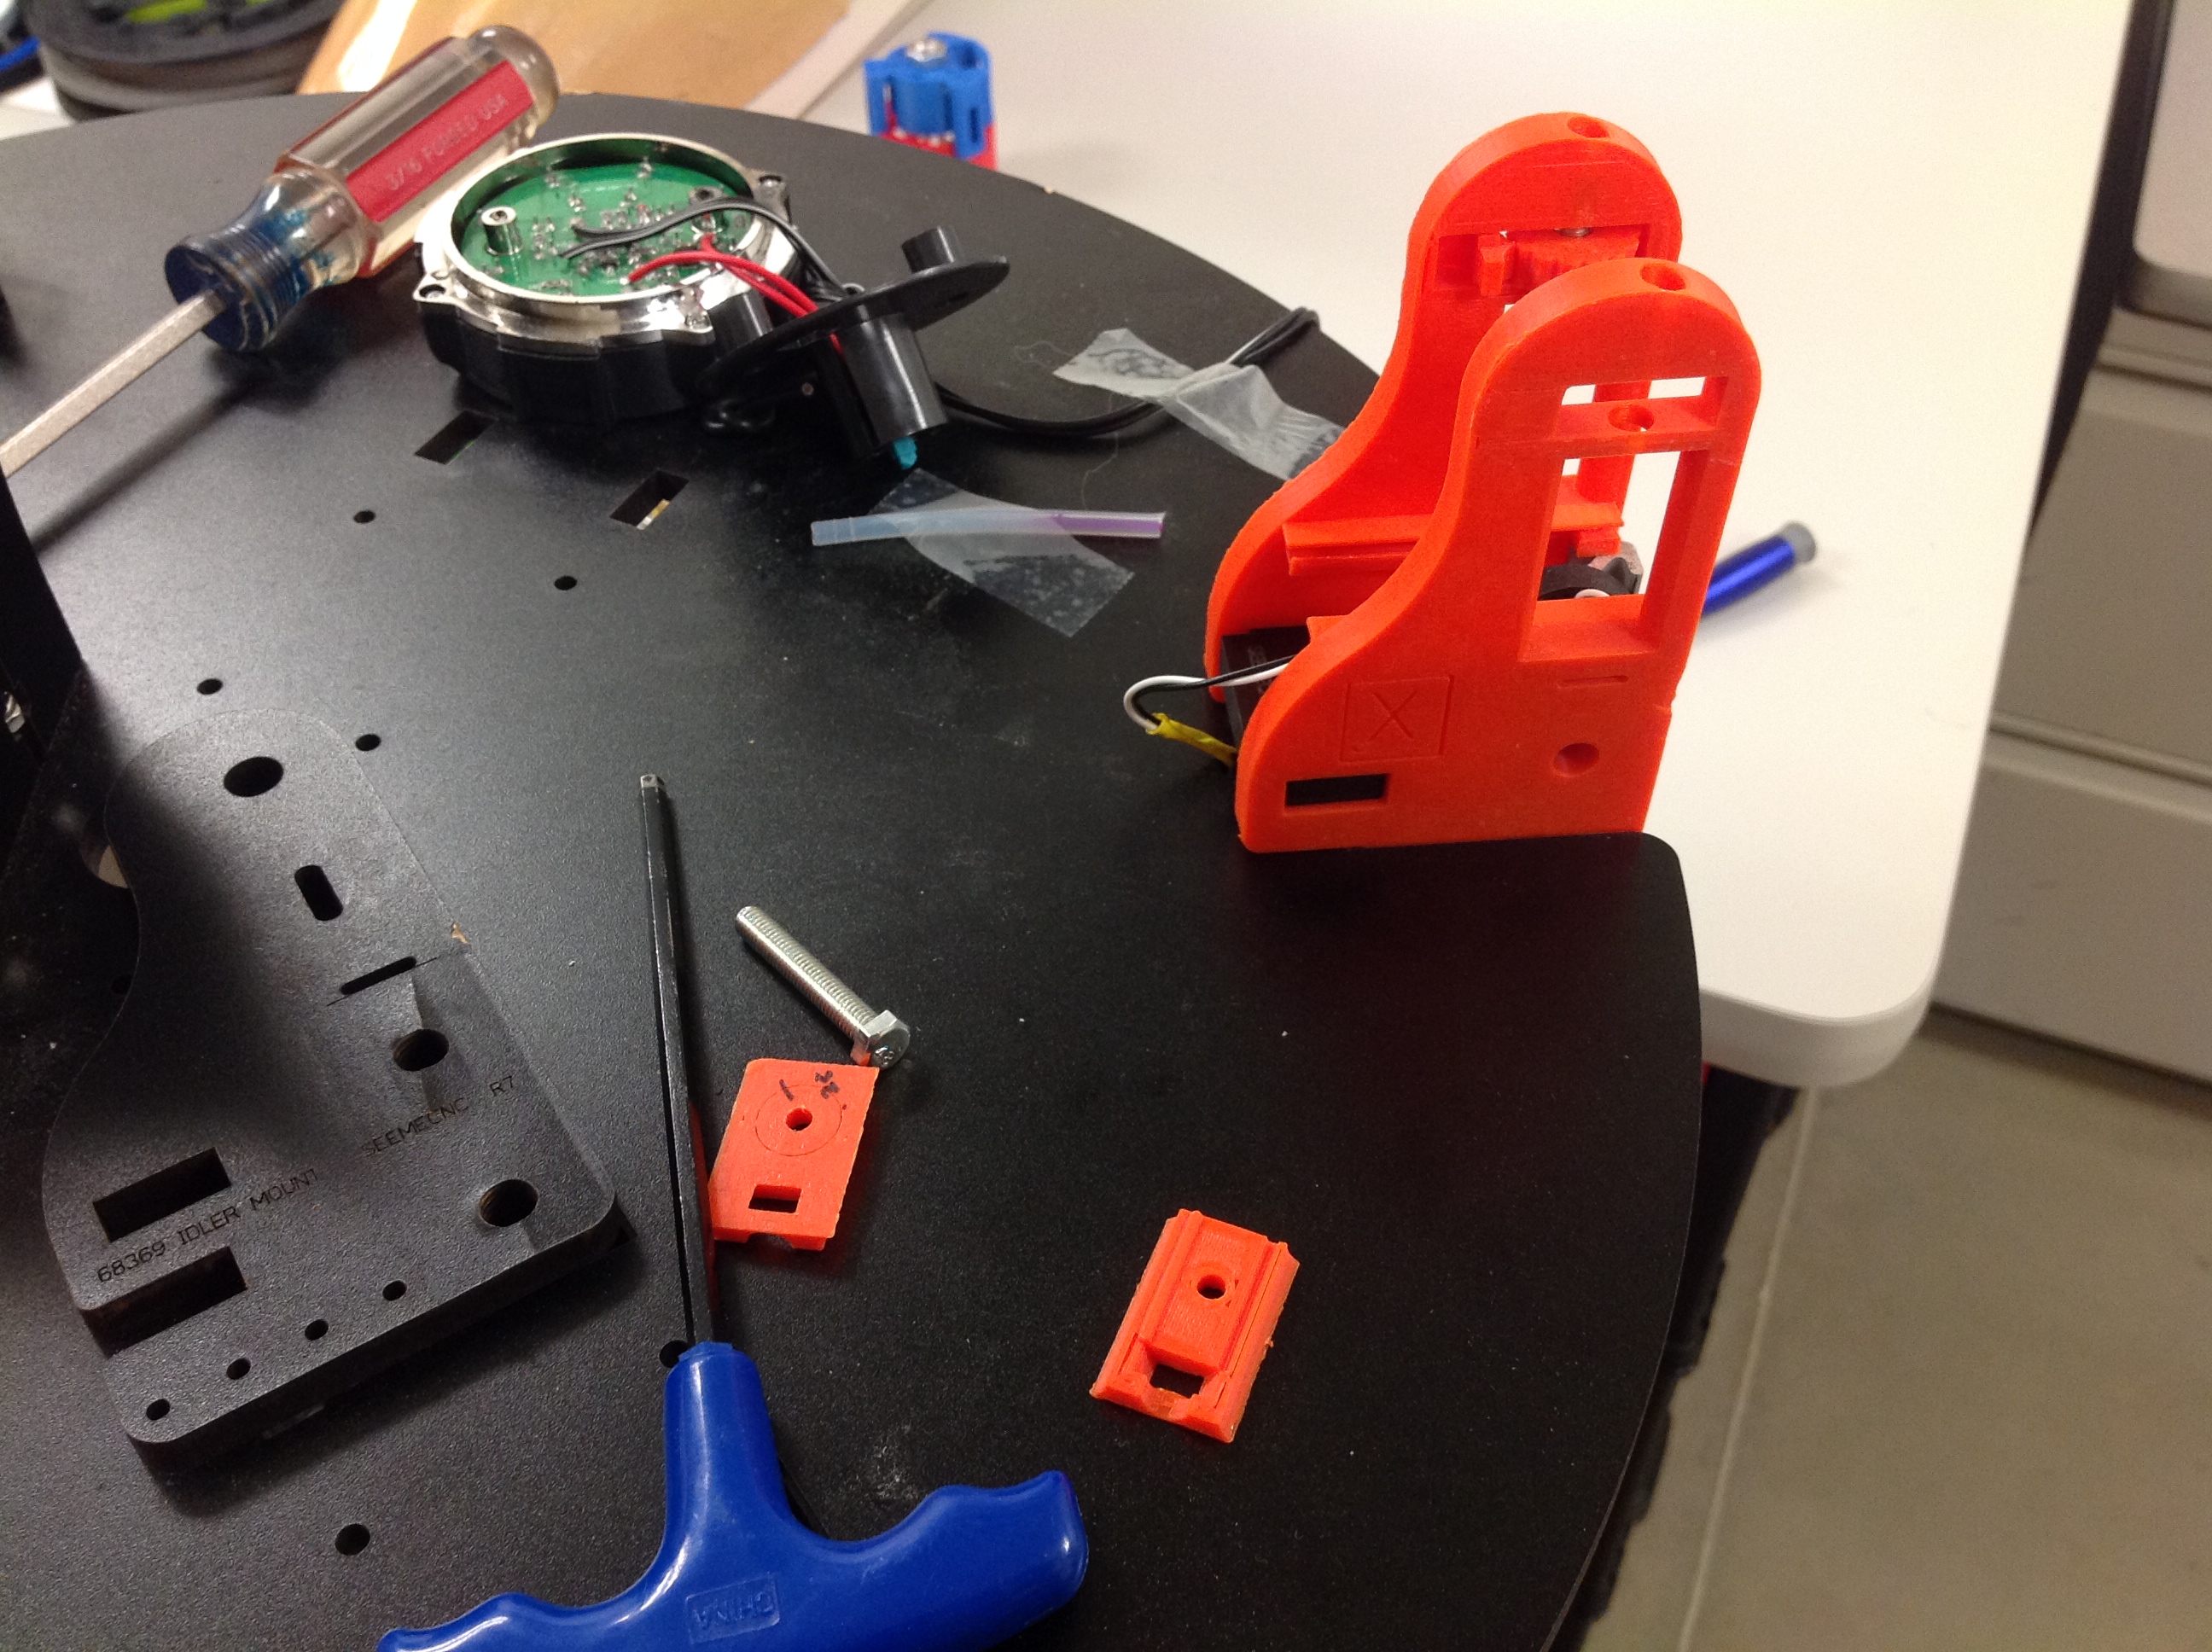
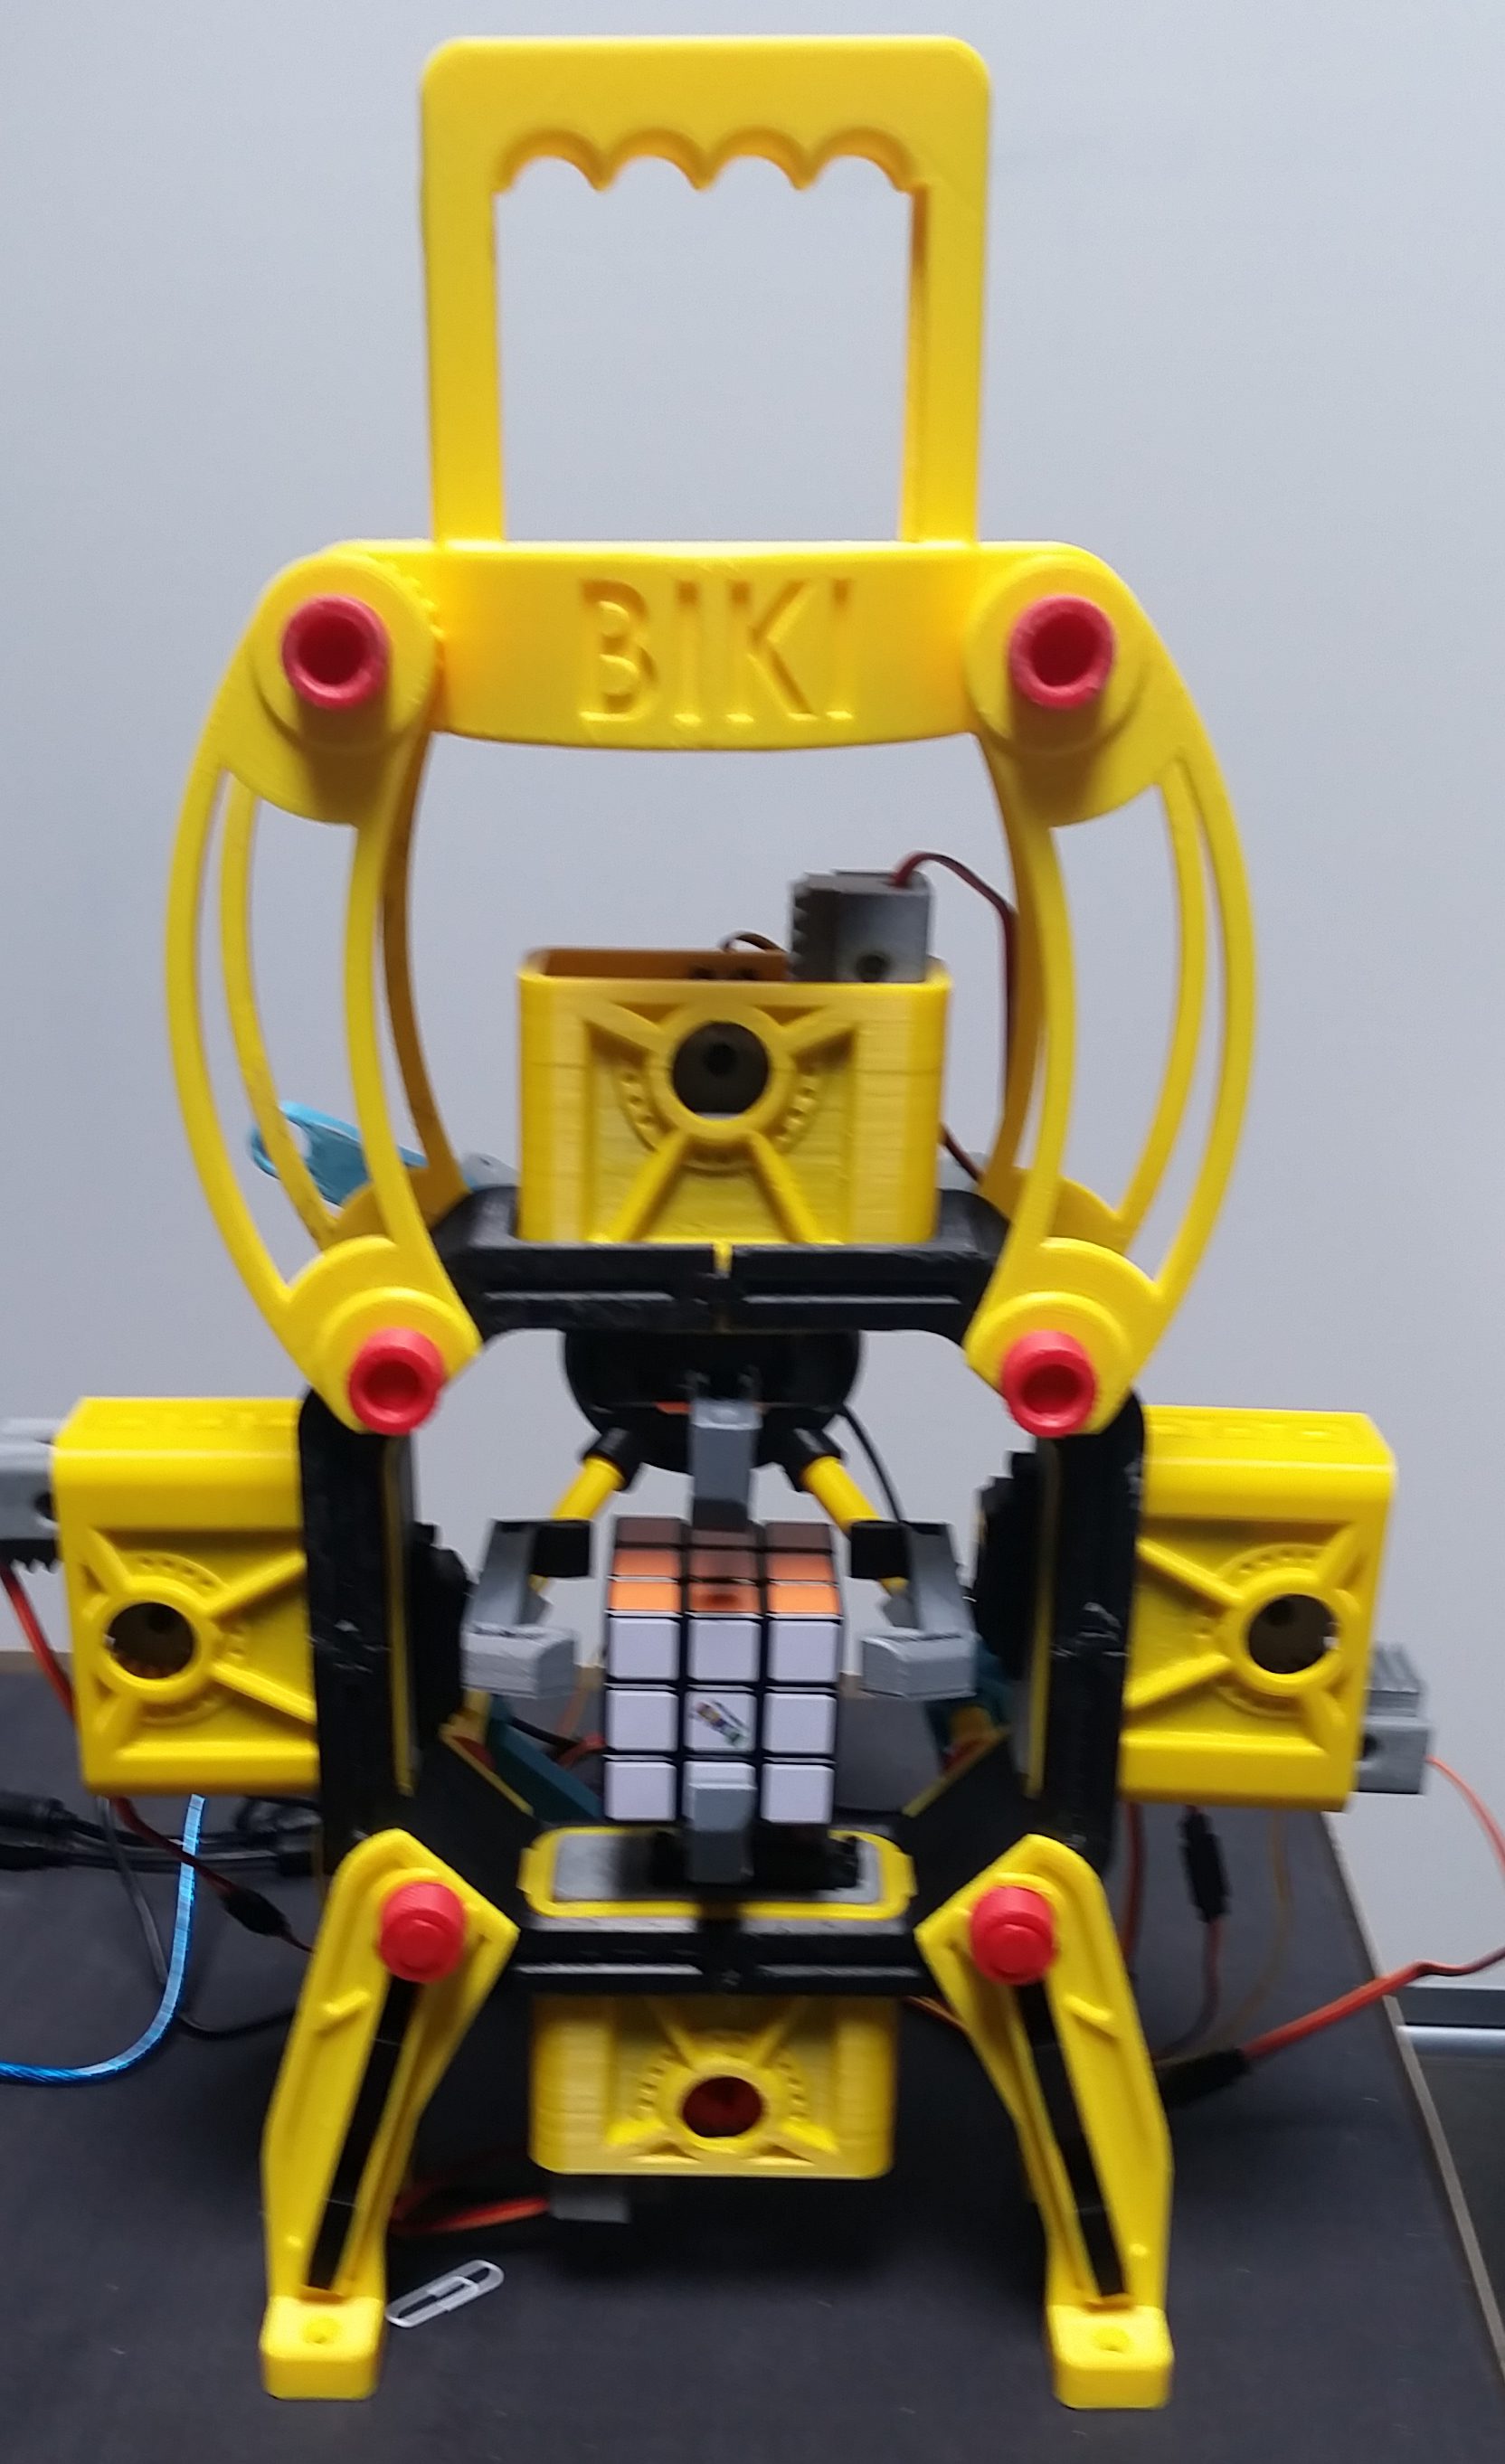 Biki is a tweaked design based on O.T. Vinta’s Rubiks Cube solving robot. All constructed of 3D printed ABS minus some fasteners and motors. A significant change from the original was to make the legs in 3 pieces with print orientations to maximize the strength of the various parts. The carrying handle was also not part of the original design. The embossed embellishments were created in SolidWorks. Simplify3D was used to drive various build files for the FlashForge Creator and Rostock Max.
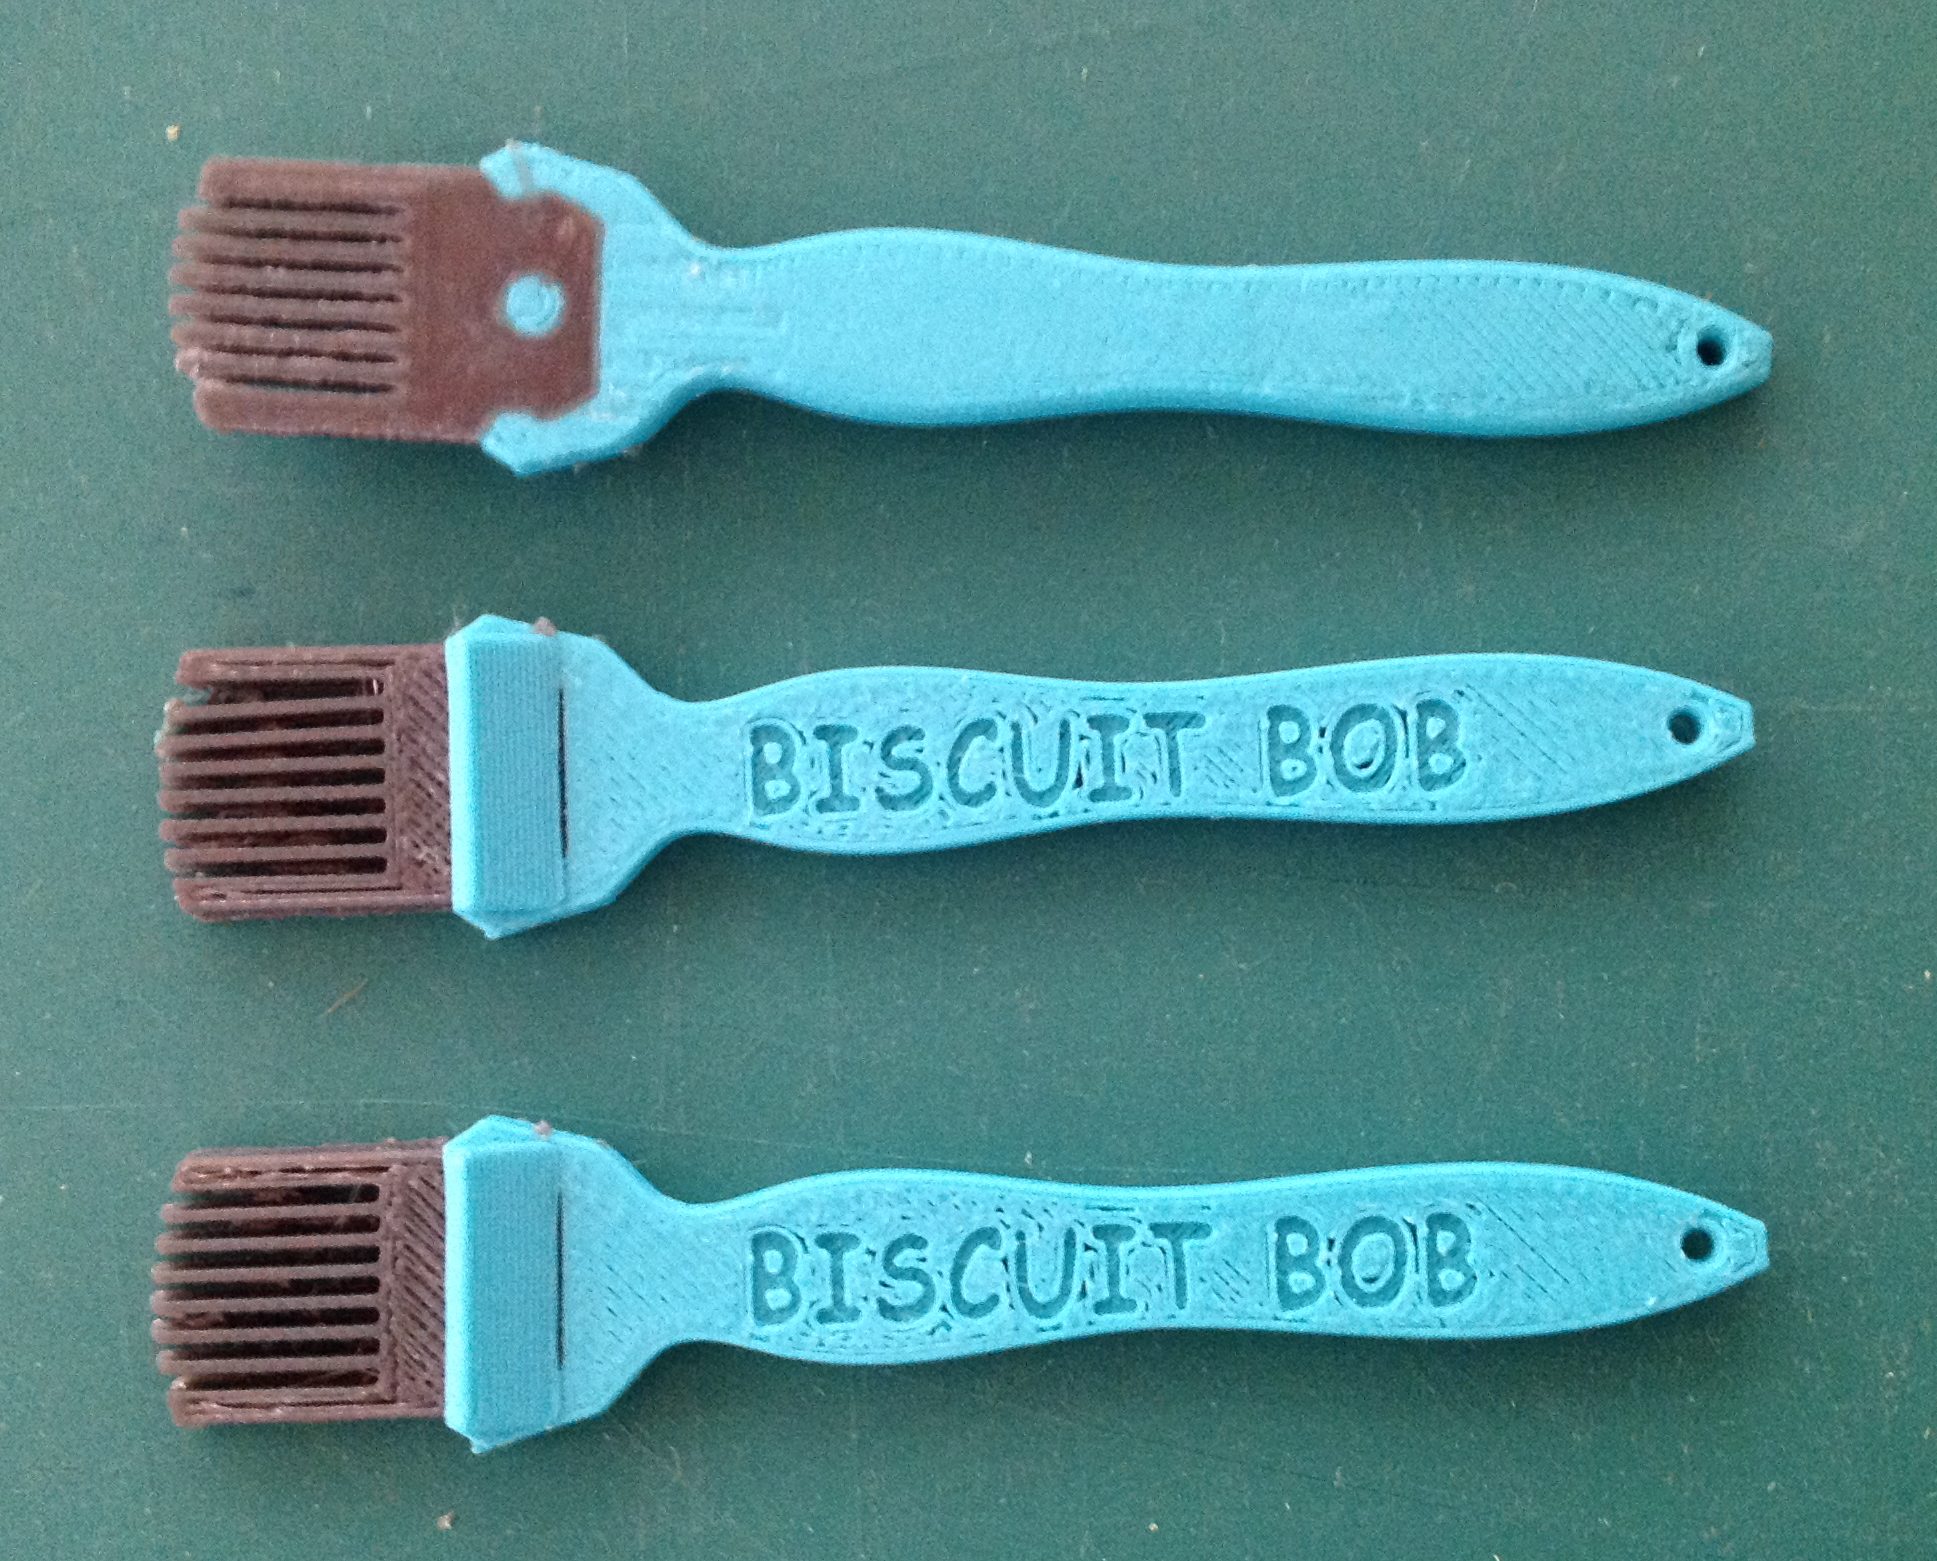 Bob the woodworker has a special flexible brush for spreading glue but it couldn’t reach in the crack of a biscuit slot. We developed a two filament print using Tough Ink filament for the bristles and ABS for the handle. The bristles are about 1/8 inch wide and fit easily in the biscuit groove.The design was done using SolidWorks and Simplify3D makes the work flow of two headed printing streamlined. The part was printed on the FlashForge Creator.
 A friend was interested in a Dinosaur bank. We found a Brontosaurus on Thingiverse. The body was hollowed out in Meshmixer and a coin slot was added. The unit was scaled and sliced with Simplify3D. This was a two tone version just to add some variety. The part was printed on the FlashForge Creator in ABS.

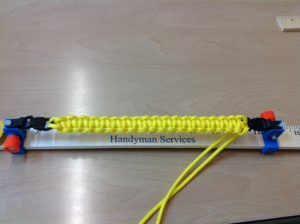
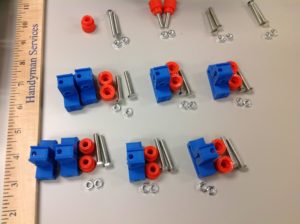
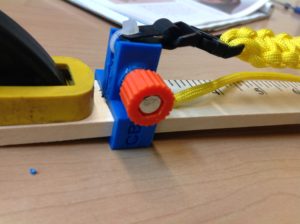 At a summer Make Camp we wanted an inexpensive way for the campers to jig up bracelets and other paracord weavings. A clamp for each end was devised that straddled a yard stick for easy sizing. With a trapped screw and nut the ends are easily adjustable to the right point on the yardstick.